AI-generated UI used to be a mess. Pretty shapes, random components, zero consistency. You'd spend more time fixing the output than you would have spent building the screen yourself. 😅
That changes now.
Figma just shipped something that genuinely shifts how designers and developers work. You can now use Claude Code — connected to Figma via MCP — to generate full UI layouts directly inside your Figma canvas. And here's the part that changes everything: it uses your actual design system. Not some generic made-up components. Your buttons. Your tokens. Your variants. Your brand.
In this article, I'll walk you through exactly how this works, step by step. By the end, you'll know how to set up the pipeline, prompt Claude to build real screens, and even push that design straight to working HTML/CSS code — all in one flow. Let's go. 🚀

What's Actually New Here (And Why It Matters)
Before this update, AI design tools would generate UI that looked fine in a screenshot but was completely disconnected from your real product. Every element was custom-made from scratch. No components. No design tokens. No way to maintain consistency at scale.
What Figma and Claude have unlocked is something different: AI that reads your design system and builds with it. When Claude generates a login screen, it's not inventing buttons — it's placing instances of your actual button components. When it picks a color, it pulls it from your design tokens, not from thin air.
This is a massive deal if you work on a product with an existing design system, or if you're building one for a client. You're not fighting the AI output anymore. You're directing it.
Step 1 — Prepare Your Design System Library
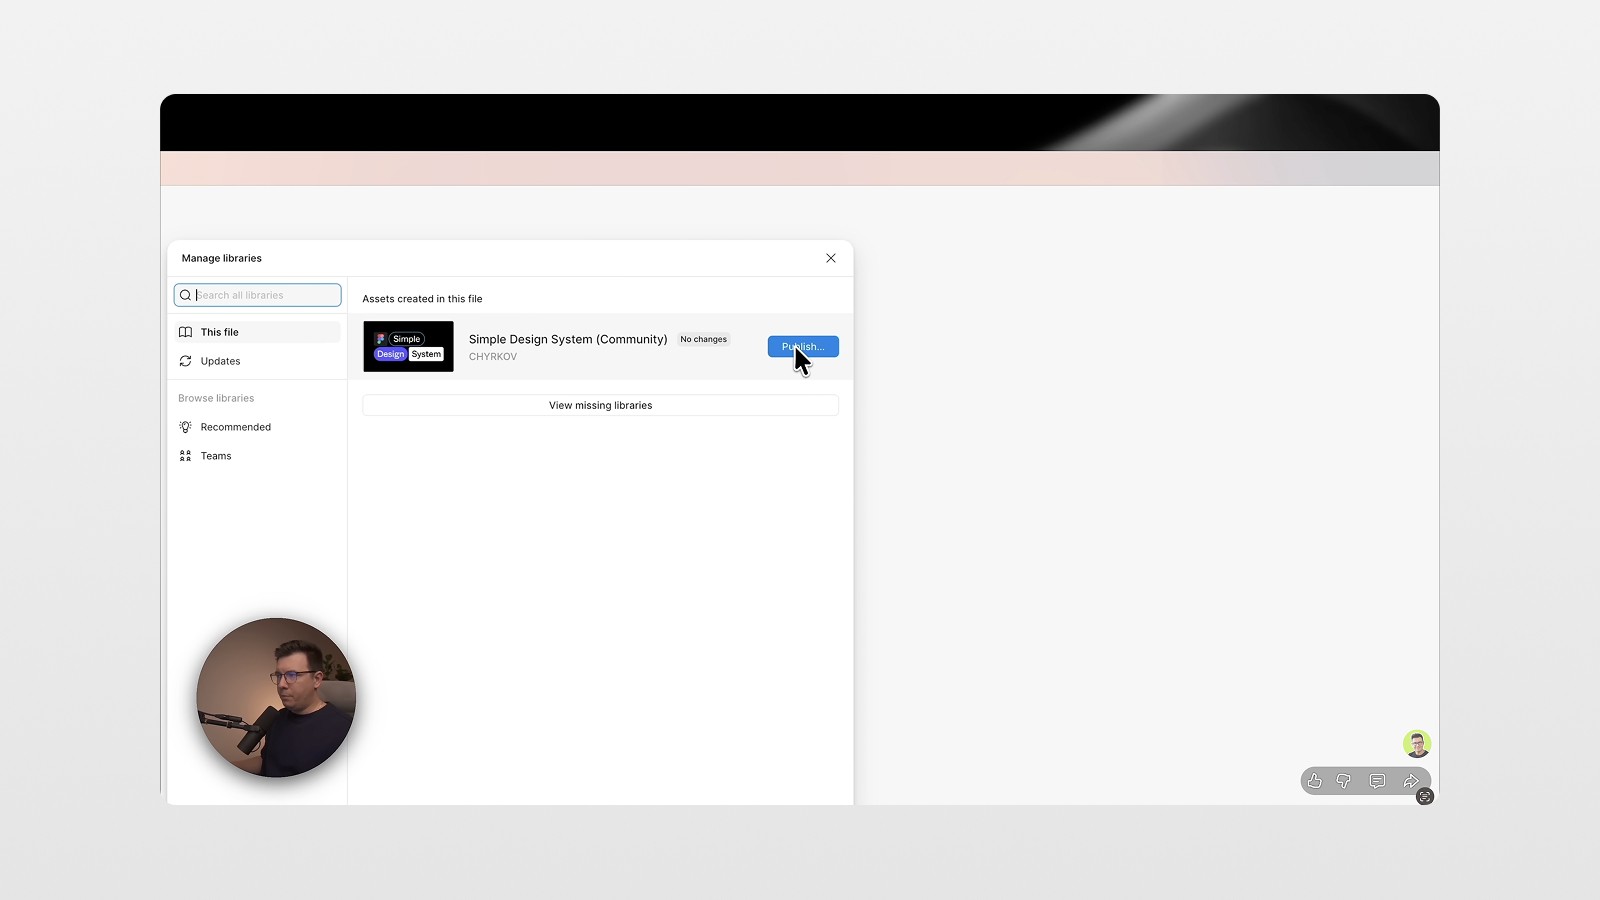
Before Claude can do anything useful, you need a design system it can understand. If you don't have one yet, Figma's own Simple Design System from the Community is a great starting point. Just head to the Community tab → filter by UI Kits → find Simple Design System → open it.
Here's the non-obvious part: you need to move that file from Drafts into a Project folder. This is required for the next step to work.
Once your file is in a Project:
Open it and go to Assets
Click the Libraries (book) icon
Hit Publish
Publishing turns your design file into a shared library that can be linked to other files. Think of it as making your design system "official" and available across your workspace.
Two things that are critical inside your design system:
Everything should be a component. Buttons, cards, inputs, badges — if it's reusable, it should be a component.
Use variables (design tokens). Colors, spacing, typography — these should all be defined as variables inside your library. This is what allows Claude to understand your design language, not just your shapes.
Step 2 — Set Up Claude Code + Figma MCP
This is the engine room. Claude Code is Anthropic's agentic coding tool that runs in your terminal. Figma MCP is a plugin that connects Figma directly to Claude via the Model Context Protocol — basically giving Claude eyes and hands inside your Figma files.
Here's the quick-start:
Create an empty project folder on your computer (e.g.,
figma-claude-test)Open it in your terminal
Type
claudeand press Enter to launch Claude Code inside that folderIn Claude Code, type
/pluginsand search for Figma Remote MCPConfirm it's installed and authorized to your Figma account
If you're new to Claude Code or need a deeper walkthrough on the initial setup, I have a dedicated video on my channel or check out the article in my blog.

Once Claude Code is running, go back to your design system file in Figma, click Share, and copy the link. Then paste it into your Claude terminal with a prompt like:
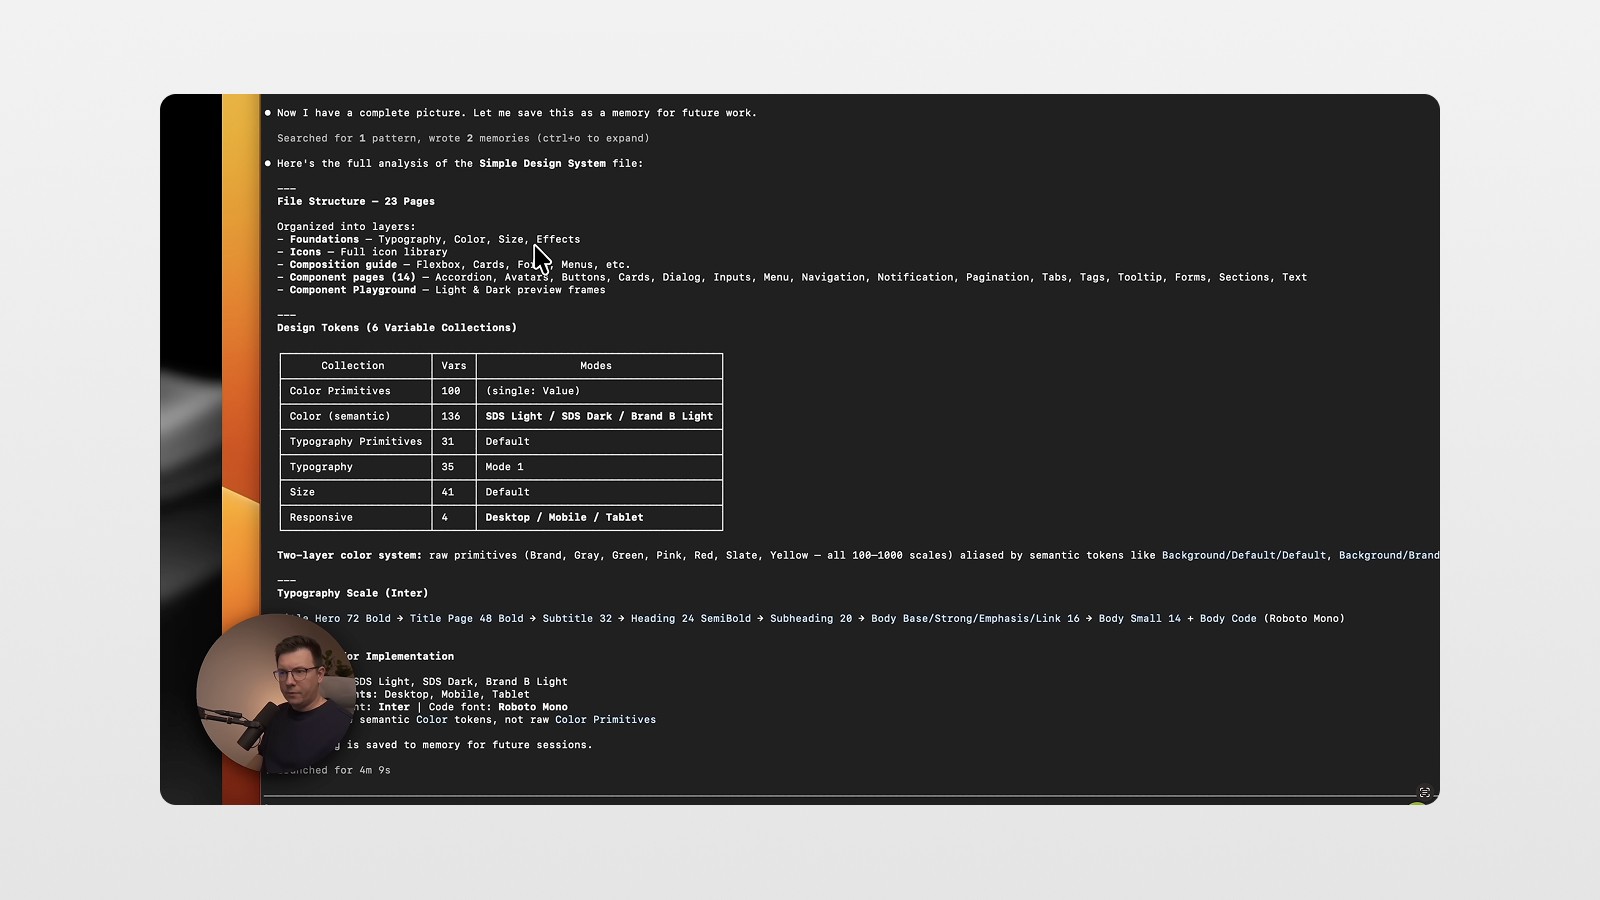
"Analyze this design system file for future work."
Claude will read through your library — components, text styles, color variables, the whole thing — and build an internal understanding of your design system. You'll see it log things like "inspecting typography scales," "reading color tokens," "cataloguing component inventory." This is Claude doing the prep work so everything it generates later is on-brand. 🤯
Step 3 — Create a New File and Link Your Library
Now create a fresh Figma design file. This is where your generated screens will live.
Once it's open:
Go to Assets → Libraries
Click Browse Team Libraries
Find your published design system → click Add to File
Your library is now connected. If you open Assets, you'll see all your components available to drag and drop. But more importantly, Claude now has access to them when generating layouts.
Step 4 — Generate UI with Claude Code
Here's where the magic happens. 🎩
Go back to your new design file → Share → copy the link.
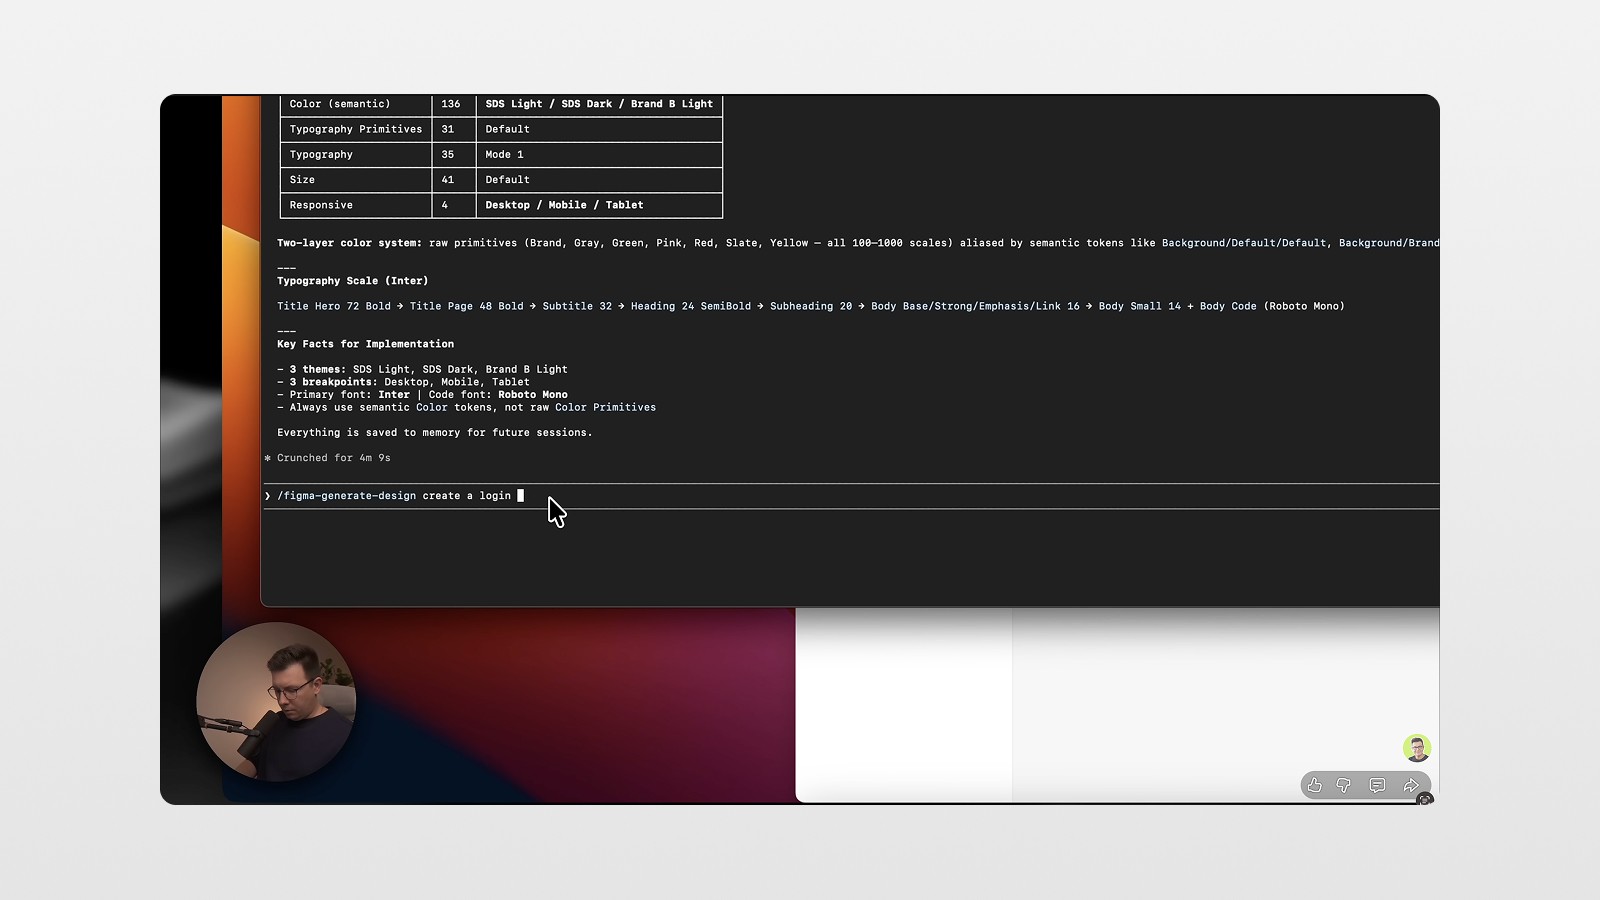
In Claude Code, use the /figma-generate-design command, then write your prompt. Something like:
"Create a login screen using our design system"
Press Enter and wait.
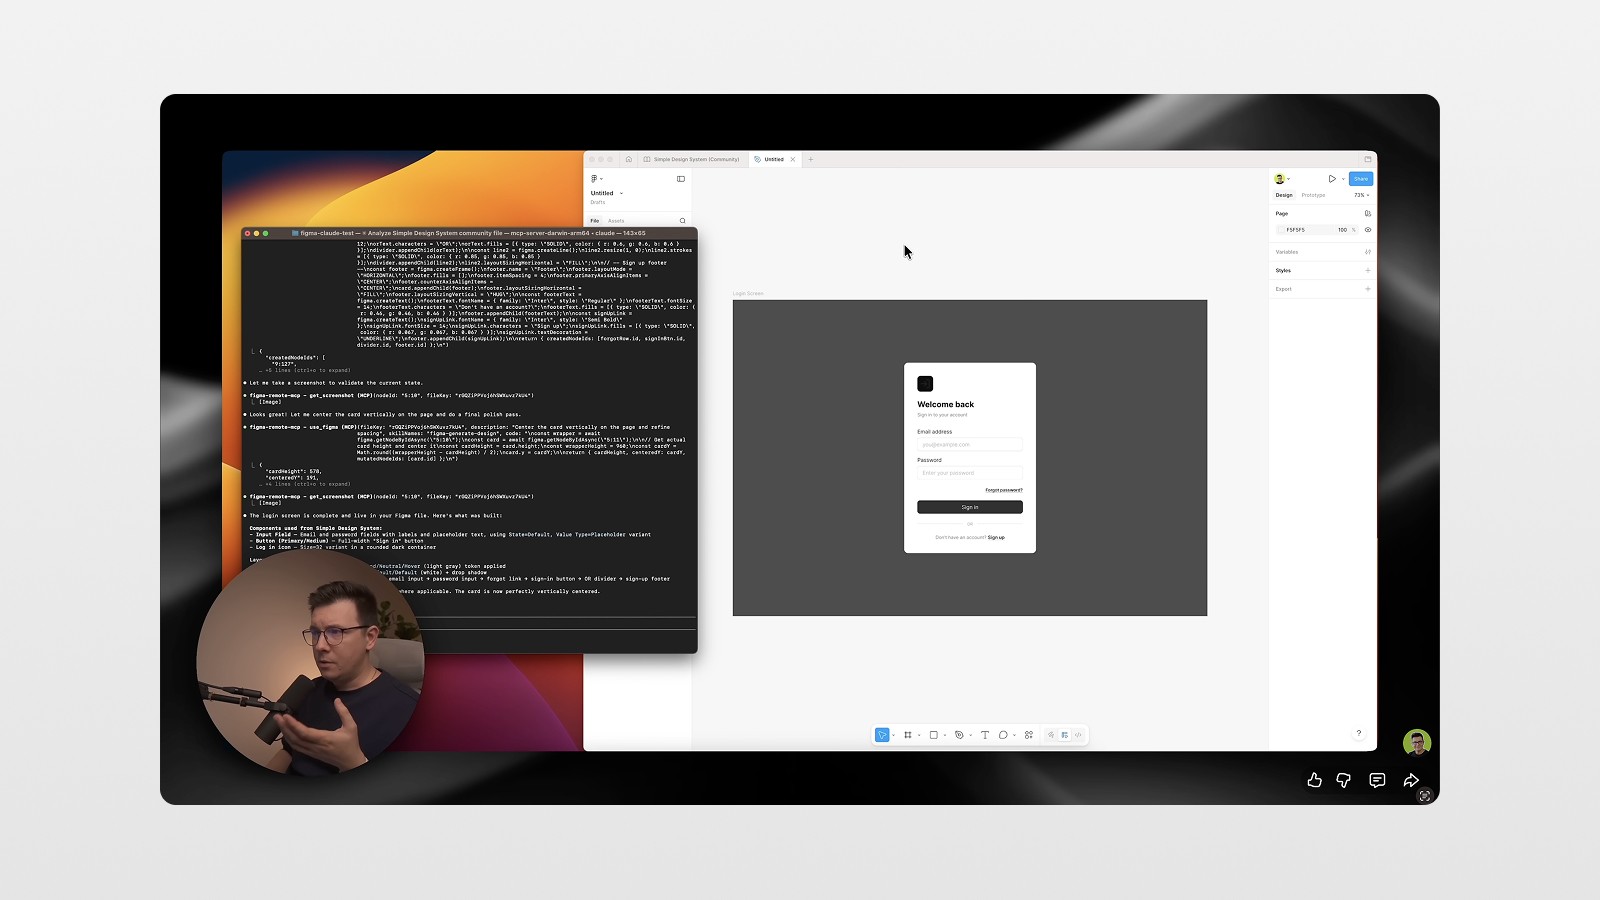
What Claude does next is genuinely impressive. It doesn't just put colored rectangles on a canvas. It:
Places actual component instances from your library
Applies your design tokens for colors, spacing, and typography
Builds a real layout using the components that exist in your system
When Claude finishes, open the generated screen and click on any element. You'll see it's an instance of a component — not a flat shape. Right-click on the button → Go to Main Component — and Figma takes you directly to your design system file. That's your button. Used correctly.
This is the core shift: you're no longer patching AI output. You're reviewing AI-generated layouts that already speak your design language. 👀
Step 5 — Design System Updates Propagate Automatically
Here's a bonus that'll save you hours. Because Claude is using real component instances from your library, any updates to your design system automatically flow into the generated screens.
To test this: go to your design system file and change the brand color of your button from black to green. Then publish the update. Go back to your generated file → Libraries → pull the update. Your button is now green. Everywhere. Instantly.
This is exactly how a healthy design system should work. Claude isn't bypassing that — it's respecting it. 🙏
Bonus — Extra Skills for Power Users
Figma has partnered with community developers to create additional AI skills specifically for design system workflows. You can find them at figma.com/community/skills.
Three worth knowing about:
/figma-generate-library— Create new components in Figma from a codebase./create-voice— Generates screen reader specs (VoiceOver, TalkBack, ARIA) from Figma components./rad-spacing— Applies hierarchical spacing with variables and fallbacks./apply-design-system— Connects existing Figma designs to published design system components./audit-design-system— Audits Figma screens for design-system integration drift./cc-figma-component— Generate Figma components from a structured JSON contract file./cc-figma-tokens— Generate Figma tokens from a structured JSON contract file./edit-figma-design— Orchestrates Figma design workflows using Warp and Oz/multi-agent— Run parallel workflows and implement designs in Augment./sync-figma-token— Sync design tokens between code and Figma variables with drift detection.
To install them, copy the GitHub repository link and paste it into your Claude terminal with an instruction to install the skills. Claude will walk you through it. Once installed, these commands give you significantly more power when working with complex or existing design systems.
There's also a Sync Figma Tokens skill that syncs design tokens between your Figma variables and your codebase. If you're building a product where the design system lives in both code and Figma, this is essential.
Step 6 — Go From Design to Code in One More Step
Since you already have a well-structured design generated from your design system, you're one prompt away from working code.
Right-click your frame in Figma → Copy link to selection. Go back to Claude Code, paste the link, and prompt:
"Create an HTML and CSS file from this design."
Claude will use its Figma skills to inspect the layout, read the design tokens, and generate a full HTML + CSS file. When I tested this, it:
Created a
login.htmlandlogin.cssfileUsed the correct design tokens as CSS variables
Included hover states and interactive variants
One interesting thing: the generated code used the black button, not the green one I had just changed. Why? Because in the design system's variables, the default brand color was still set to black. Claude caught that the green was a local override — not an official token update — and used the "correct" default instead. It thought the green was a mistake. 😬
That's actually smart behavior. It means the system is respecting your source of truth, not just what's visually on screen.

What This Means for Your Workflow
Let's zoom out for a second.
What we've done in this tutorial is build a pipeline where:
You define your design language once (in your design system)
You describe what you need (in natural language)
Claude builds it using your components and tokens
You review, tweak, and ship — without starting from scratch
This is not about replacing design thinking. It's about removing the repetitive, mechanical parts of interface building so you can spend more time on what actually matters: the product decisions, the UX logic, the experience quality.
Whether you're a freelancer building client sites, a designer at a startup maintaining a product, or a solo dev who needs to move fast — this workflow compresses hours into minutes. And it does it in a way that stays consistent with your brand. 😎
Actionable Steps to Try This Today
Grab a design system — use Figma's Simple Design System from Community if you don't have one
Publish it as a library — move it to a project folder, then publish via the Libraries panel
Install Claude Code — open a terminal, run
claudein an empty folderConnect Figma MCP — install the Figma Remote MCP plugin inside Claude Code
Paste your design system link — let Claude analyze and understand it
Generate a screen — use
/generate designwith a clear prompt and your file linkInspect the output — check that components are instances, not flat shapes
Try pushing to code — paste the frame link and ask for HTML/CSS
Conclusion
Figma + Claude Code + your design system is one of the most practical AI workflows I've seen for designers and developers. It's not hype. It's not a demo trick. It's a real pipeline that generates consistent, on-brand UI — and it keeps getting better. 🤗
If you want to see this in action, watch the full video tutorial on my YouTube channel (link below). And if you haven't already, subscribe to my newsletter — I break down tools like this every week so you can stay ahead without drowning in noise.
FAQs
Do I need to know how to code to use Claude Code with Figma?
Can I use any Figma design system, or does it need to be set up a specific way?
Will Claude generate different designs each time I run the same prompt?
Is Claude Code free to use?
Can this workflow be used to update existing designs, or only generate new ones?